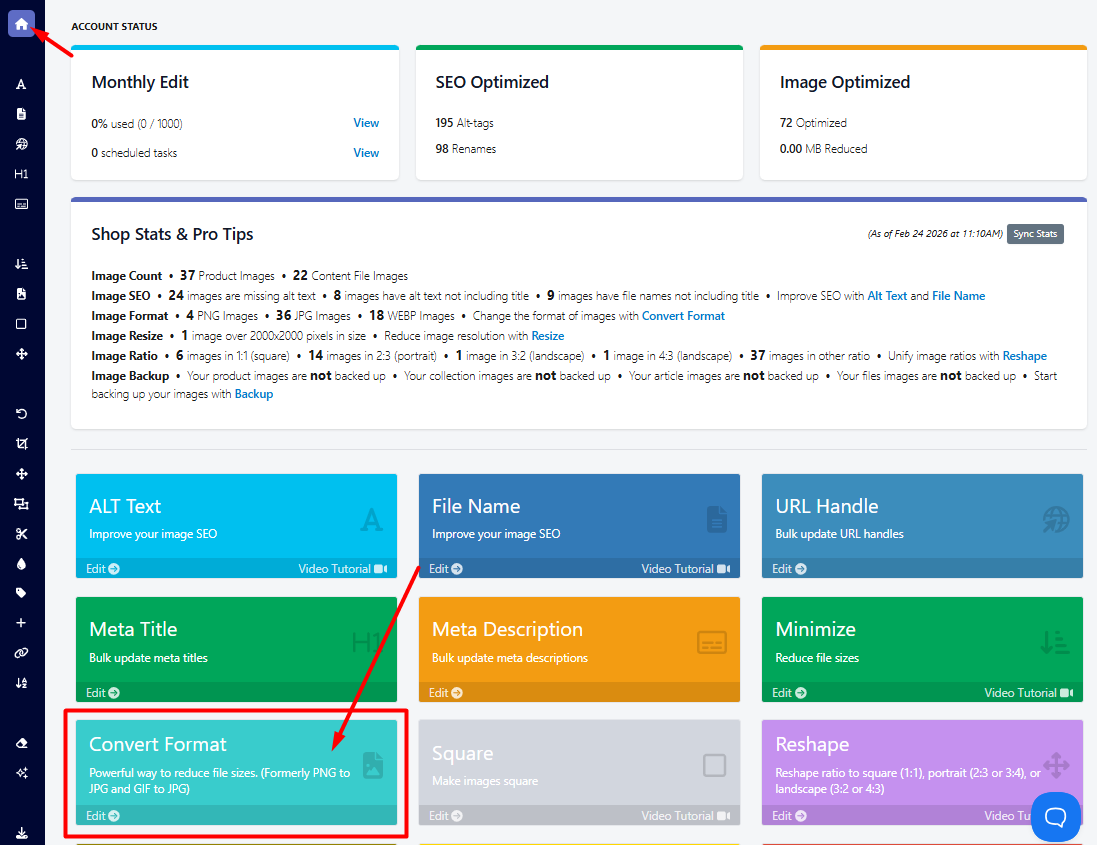
Tutorial on Convert Format feature
The Convert Format feature is a powerful tool designed to help you easily convert images into different file formats. With this feature, you can seamlessly change your image formats between:
- PNG to JPG
- GIF to JPG
- WEBP to JPG
- PNG to WEBP
- JPG to WEBP
- JPG to PNG
- Faster loading times for your website, enhancing user experience.
- Improve search engine performance by optimizing image formats for better SEO.
For this tutorial, we will be converting from PNG to JPG so that the file size will be reduced, resulting in faster loading times and a better user experience with your store. To get started, follow these steps below:
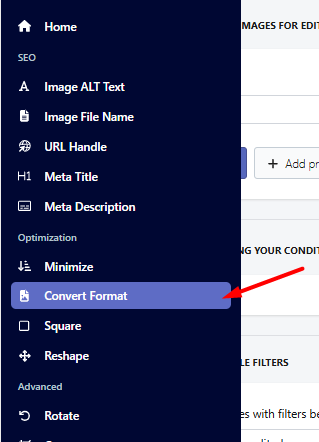
- Go to the Convert Format feature in the app. You can access this either by going to the app dashboard or the sidebar menu.
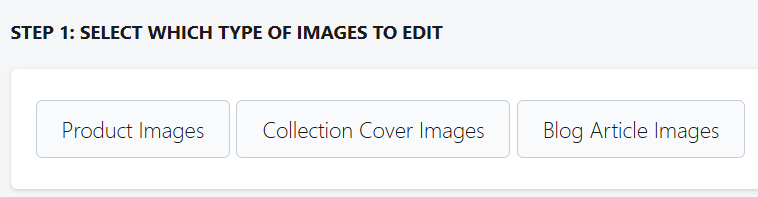
- On the Convert Format page, you need to select first which type of images you want to edit. You can choose from Product Images, Collection Cover Images, and Blog Article Images. For our example below, we will edit "Product Images."
Note: Content file images are not supported for conversion. Converting these files changes the image source URL (for example, from https://example.jpg to https://example.webp ).
If the original JPG URL is used anywhere in your store—such as in a product description or blog article—and the file is converted to WEBP, the original link will no longer be valid. This can result in broken or missing images appearing on your storefront.
- On the second step, you need to set your condition for the product filter to find the images you want to edit. We will search for products that contain "shirt" in the title in this case. You may click the Preview matching images button to have a preview of the products that meet your criteria.

In the screenshot above, my black and red shirt is in PNG format.
Tip
If the image or collection isn’t displaying after being recently added, click the Sync Collections button in the product filter. This will refresh and fetch the latest updates.

- Next, you need to select what type of edit you want for these images. Since I want to convert the PNG images to JPG, I will be choosing that.

- After that, you can review everything and click on Start Bulk Editing to begin the image type conversion edit, and wait for the task to finish.

- Once the task is done, we can go ahead and review it on our One-time Tasks page by clicking the Details button.

In the screenshot below, we can see that it edited the images that are in PNG format and converted them accordingly. This resulted in a lower file size, making the loading time faster for our customers.


Note: If an image already matches the selected bulk edit format, it will be automatically skipped during the task to avoid unnecessary changes.
You can also watch the video tutorial below:
If you have any questions, please do not hesitate to contact us via the app or email us at help@hextom.com